

Homemade Energy Bites
Homemade Energy Bites
Simple ideas that are easier to make than you might imagine…and a formula to use when developing your version.

Two outcomes are guaranteed whenever I decide to make energy bars.
I end up with sticky fingers and bowls.
I have a supply of quick and nutritious snacks to take with me when I’m out exercising…or on a long road journey…or flying off somewhere (vegan offerings on planes are dreadful)…or when I’m immersed in a challenging writing project and need a quick pick-me-up.
Good idea…excuse me for a minute while I embrace outcome #2 <insert pause here>…

Simple and Versatile
Most energy bars require no cooking. It’s a simple process of mixing the ingredients, forming and portioning them, and keeping them refrigerated or in the freezer. It’s as basic as making a smoothie.
Some formulas benefit from eliminating excess moisture. This creates a firmer texture that’s easier to take along while exercising. In this case, using a dehydrator works well, but most of us don’t have that luxury in our homes, so turning to the oven is the obvious solution. Set the oven temperature to low – something around 50°C (125°F). Place the energy bars on a baking tray lined with paper or a silicon mat and then pop them into the oven for 30-60 minutes. For extra firmness, turn off the oven and keep the energy bars in there for 4-6 hours – or even overnight (be sure to put a note on the oven door to remind you to take them out before cranking up the oven again – yep, that’s experience talking).
I use a food processor to mix dry base ingredients, binders, sweeteners, flavor extracts and dried spices with any additional liquid. I fold nuts, seeds, and dried fruits into the mixture after removing the blended mass from the food processor…and that’s it.
When making bars, I pack the finished mixture into a relatively flat baking dish – usually 20 x 20 cm (8 x 8 inches), pop it in the freezer for 30-60 minutes, then portion and pack the bars…or dehydrate them first.
Tip…pack the mixture into the baking tray and flatten with damp hands. Then cover the top with a piece of plastic wrap or baking paper, and press down with your hands or another baking pan that fits inside the first one.
When making balls, I form the mixture into individual walnut-sized balls with my slightly damp hands and either freeze them or roll them in carob, cocoa, chopped seeds or chopped nuts to add a bit of texture and additional flavor.
A Formula that Works
The basic method for mixing and forming energy bars and balls is simple to master…then the creative process takes off. It’s simple to invent new and exciting combinations that keep my mouth entertained…even amused…without compromising my nutritional standards.
The bonus is that I get to control the ingredients and avoid the stuff I don’t want to consume – stuff often present in mass-produced energy bars, like hydrogenated fats, too much sugar, too much fat, and the dreaded mystery ingredient – artificial flavors.
I like to work from this list of ingredients whenever I want to put something new together. I select one or more component from each category, blend everything in a food processor, and finish my creation by folding in nuts or seeds.
Binders
Chopped Dates or Prunes (pitted and softened)
Nut Butter
Tahini
Ground flax seeds
Psyllium husk
Dry Base Ingredients
Rolled Oats (GF if necessary)
Hemp protein powder
Pea protein powder
Chickpea flour
Coconut flour
Carob powder
Cocoa powder
Sweeteners
Maple Syrup
Agave Syrup
Brown Rice Syrup
Yacon Syrup
Flavor Extracts
Ground Vanilla Bean or Extract
Coffee
Dried Spices
Cinnamon
Ginger
Turmeric
Black Pepper
Salt
Dried Fruits
Cranberries
Raisins
Sour Cherries
Goji Berries
Figs
Nuts (raw or roasted) and Seeds
Almonds
Cashews
Brazil Nuts
Pistachio Nuts
Pumpkin seeds
Sunflower seeds
Sesame seeds
When I think about the opportunity cost of making my own vs. picking up a Cliff Bar…or Nak’d Bar1 at the local supermarket, I don’t mind the trade-off between getting sticky fingers and investing a bit of my time to gain control over the ingredients I put into my body. I think it’s a small price to pay for something so delicious, nutritious and fiber-rich.
1Full disclosure – I have no affiliation with Cliff Bars, Nak’d Bars or any other products…and yes, I am a bit of an economics geek.
Spiced Cashew Energy Balls

I enjoy making snacks to have on hand in case I need to reach for something quick or before I head out for some exercise. These little spicy energy balls are perfect – they are simple to make, last a long time in the freezer and taste amazing. So, if you’re looking for a way to put a little zest and pep in your step, look no further than these little gems!
Difficulty: simple
Yield: makes about 32 balls
Ingredients
250 grams (about 1 cup) of raw cashew nuts
400 grams (about 2 ½ cups) of dates (with pits removed)
pinch of salt
1 teaspoon ground vanilla bean
2 teaspoons turmeric
2 teaspoons ground cinnamon
2 teaspoons ground ginger
1 teaspoon cocoa powder
Method
Combine all ingredients in a food processor. Pulse until relatively smooth.
Remove the mixture and form it into balls or bars. I like to portion mine using a scale and weighing clumps in 20-gram portions. I shape them into balls with damp hands, making the process much easier.
Refrigerate as is or dehydrate at 47° C (about 115° F) for 12 hours. Store in an airtight container in the refrigerator or freezer.
Tips and Variations
You can also mix up the spices a bit. I like this combination because of the flavor, but there are no rules here, so play around with what you enjoy eating. The main part should include the correct nuts-to-date ratio.
Tahini and Oats Energy Bars
The method I use to make these energy bars is slightly different from my ‘template’ instructions. I gently heat the tahini, maple syrup and spices first, then fold the rolled oats, flax seeds and dried fruit into the mixture. The result is a firmer mix that sets rapidly…so you need to work fast.
Difficulty: simple
Yield: makes about 30 3-cm squares (about 1-inch)
Ingredients
250 grams (1 cup) tahini
140 grams (1/2 cup) maple syrup
1 teaspoon cinnamon
¼ teaspoon turmeric
1/4 teaspoon sea salt
Black pepper – 2 turns from a mill
200 grams (2 1/4 cups) of rolled oats
40 grams of ground flax seeds
3 tablespoons raisins
3 tablespoons goji berries
Method
Prepare the form by lining the bottom and sides with plastic wrap. I like to brush on a light coating of water and place the plastic on it, then ensure it is completely smooth.
Add the tahini, maple syrup, cinnamon, turmeric, salt and black pepper to a medium pan. Mix well, then gently heat the mixture over low while stirring - about 2-3 minutes or until the mixture is loose and smooth. Remove from the heat.
In a medium-sized bowl, mix the rolled oats, ground flax seeds and dried fruits. Add this mixture to the tahini mix and stir well. Work quickly because the mix should not set in the pot.
Add the mix to the prepared mold, and press it into the pan. I like placing another piece of plastic wrap on top of the mixture and pressing a second empty pan onto it. This creates a compact mixture, which is precisely what you want.
Place the pan in the refrigerator for about 2 hours (or in the freezer for 45 minutes if you are in a hurry) to firm up the mixture and make it easier to portion.
Remove the pan from the refrigerator (or freezer if you went that route), invert it onto a clean cutting board and gently ease the mix out of the pan by pulling a bit on your plastic lining. Cut into portion sizes.
Set the oven temperature to 40° C (100° F) and keep them there for about 8 hours (usually overnight). They hold several weeks in the refrigerator or months in the freezer (although I usually eat them within a couple of weeks).
Tips and Variations
If you don’t like the slight bitterness in tahini? Well, that’s not a problem because you can substitute any nut butter in equal amounts. Try almond or cashew butter for a milder energy bar.
You can also substitute the maple syrup with any syrup – agave and date syrup work especially well.
The spices can be changed – ground ginger, gingerbread spices and even a touch of cayenne pepper are some suggestions to get you thinking creatively.
Wetting your hands a bit when handling the mixture and placing it into the pan is helpful. Make sure you push down on the energy bars to make them as compact as possible.
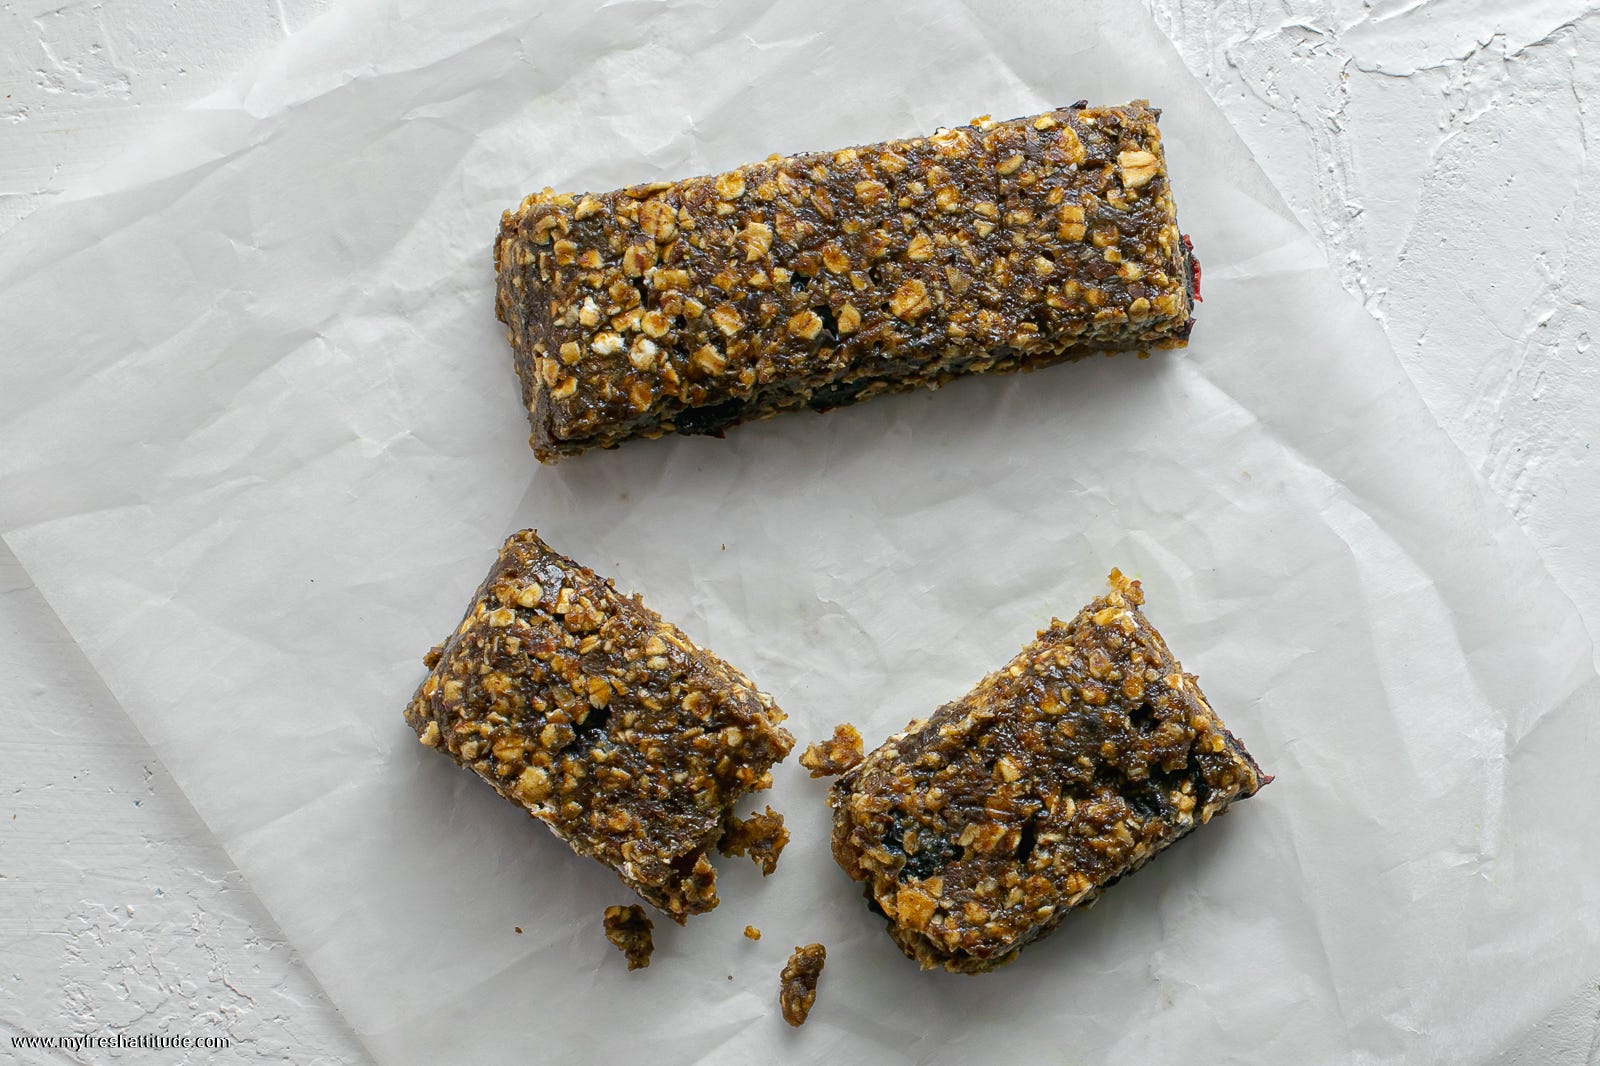
Chewy Granola Bars

Combining rolled oats, fat, sugar and syrup into small baked bars is a typical snack in most English-speaking countries. These kinds of bars are called ‘flapjacks’ in the UK and Ireland, oat bars or oat slices in Australia or New Zealand, and granola bars in North America. All are similar, and the name is interchangeable, although granola bars usually include dried fruits and nuts in their formula.
My version is a variation of the North American style from the mid-1800s and re-invented in the 1960s and 1970s. I use a combination of dates, prunes, almond butter, maple syrup, oats and nuts to formulate the base, then add any number of additional ingredients to create unique flavors – anything from dried cranberries or figs to a good pinch of fleur de sel to create an interesting salty-sweet combination.
These bars keep well in the freezer for months.
Difficulty: simple
Yield: about 18 to 24 pieces
Ingredients
150 grams (3/4 cup) pitted dates, roughly chopped
100 grams (1/2 cup) of pitted prunes, roughly chopped
70 grams (1/4 cup) maple syrup
60 grams (1/4 cup) almond butter
50 grams (1/2 cup) of whole almonds, roughly chopped
160 grams (2 cups) of rolled oats
½ tsp sea salt
60 grams (1/3 cup) of dried cranberries or raisins
60 grams (1/4 cup) of dried figs, chopped
Method
Line a 20 X 20 cm (8 x 8 inch) flat baking tray or dish with parchment paper or plastic wrap. Preheat the oven to 130°C (265°F).
Process the chopped dates and prunes in a food processor until they become thick and pasty. Add the maple syrup and process to mix the syrup into the paste. Remove the contents and place them in a large bowl.
Add the almond butter, chopped nuts and oats to the paste. Season with salt. Mix to incorporate the ingredients equally. The mixture should be thick and somewhat dry. Fold in the dried fruit and chopped figs.
Add the mixture to the prepared tray or dish and press it firmly into the pan to create a flat and even layer (easier if wetting your hands with water beforehand).
Place in the preheated oven and bake for 15 minutes. Allow them to cool completely, then flip the baking pan onto a cutting board – the granola mix should come out of the pan easily. Cut into individual serving-sized portions. Store in an airtight container in the refrigerator or freezer.
Tips and Variations
Soak the dates and prunes in warm water for about 20 minutes to soften them if they are too hard to process. Be sure to drain them well before adding them to the processor.
Granola bars can be eaten raw without baking them. Place them in the freezer for about 15 minutes before portioning them, then keep them refrigerated or frozen.
The oats can be used raw or slightly toasted. Place the oats on a clean baking tray and put them into a preheated 175°C (340°F) oven for about 10 minutes or until they are lightly golden.
Use 30 grams (1 ounce) of agave syrup to replace the maple syrup.
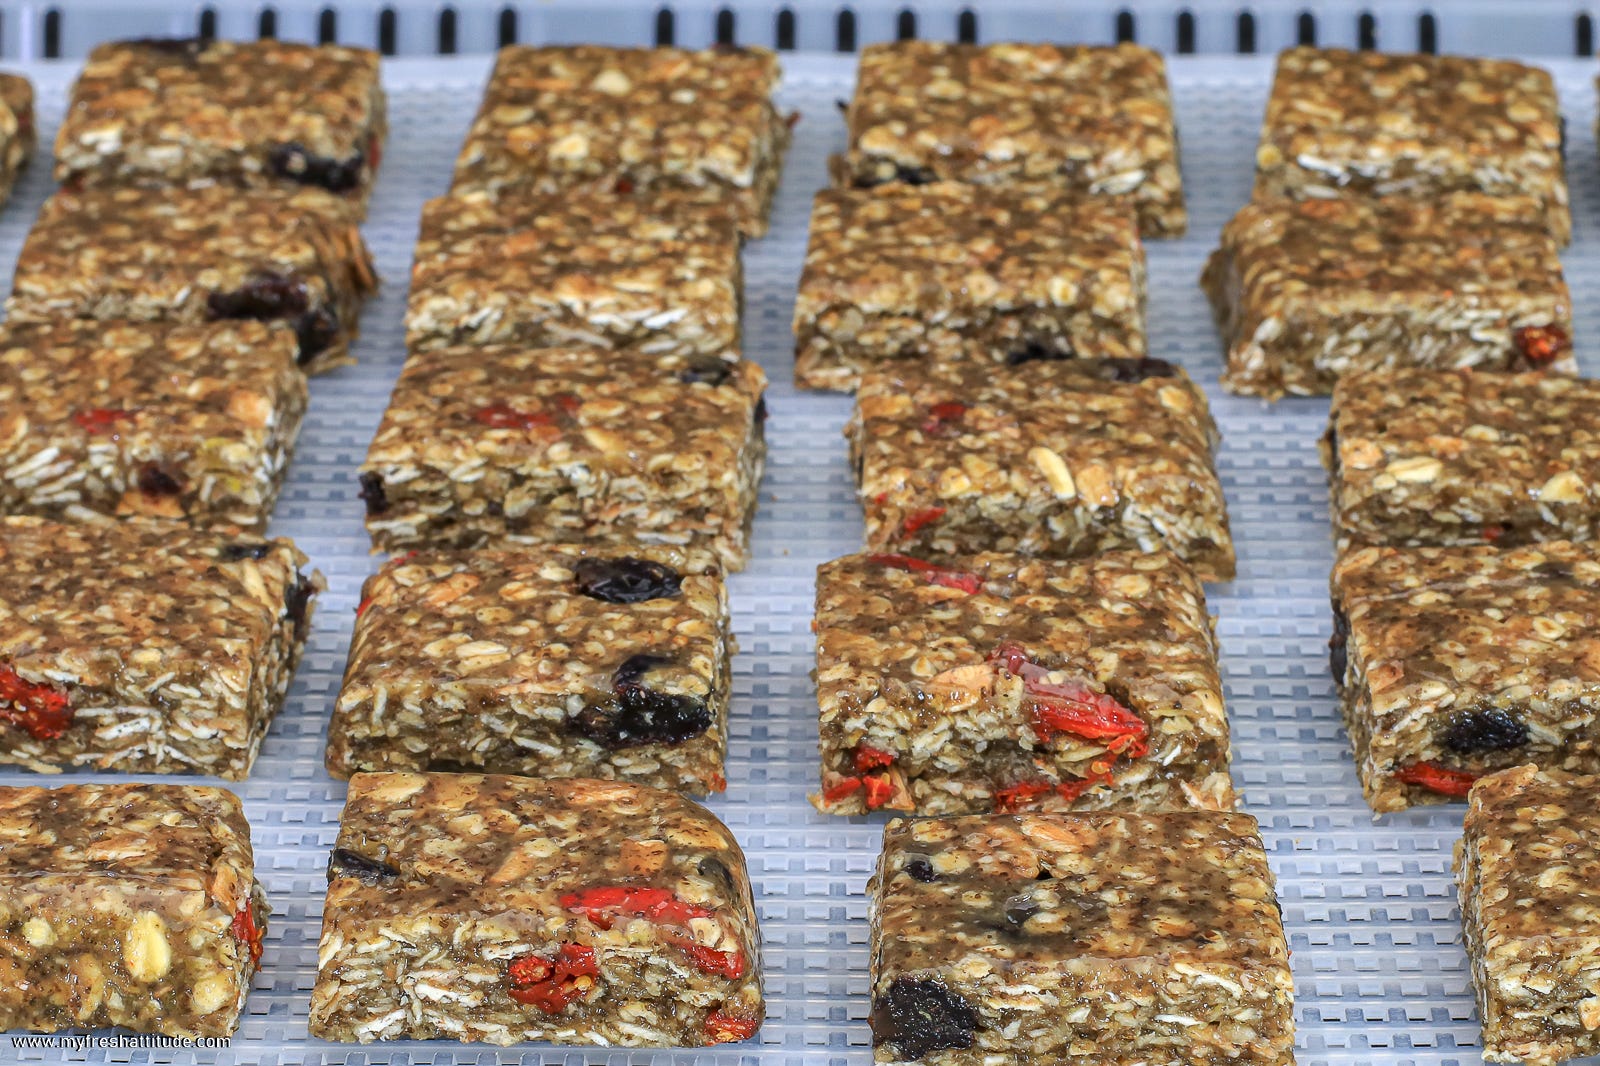
High-Fiber Energy Bars
I like to have a batch of these high-fiber energy bars lingering in my freezer at all times. They are perfect for taking along while traveling on a plane or a long car trip. Because of their high amounts of protein, I also like grabbing a bar after a long workout at the gym or immediately after biking or running.
Difficulty: simple
Yield: about 18 to 24 pieces
Ingredients
65 grams (2/3 cup) of ground flax seeds
65 grams (1/2 cup) of ground hemp protein powder
1 tablespoon of psyllium husk
200 grams (2 cups) of rolled oats
1/2 teaspoon of ground vanilla bean
1/2 teaspoon of sea salt
80 ml (1/3 cup) soy milk
120 grams (1/2 cup) tahini
175 grams (2/3 cups) of maple syrup
160 grams (1 cup) of dried sour cherries
Method
Line a 20 X 20 cm (8 x 8 inches) flat baking tray or dish with parchment paper or plastic wrap.
Combine the ground flax seeds, hemp protein powder, psyllium husk, rolled oats, ground vanilla bean and salt in the bowl of a food processor. Pulse several times to mix the ingredients.
In a separate small bowl, mix the soy milk, tahini and maple syrup.
Pour the wet ingredients into the food processor while the machine runs. Process until the mixture clumps together, then remove the mix to a clean bowl. Fold in the sour cherries, making sure to mix the ingredients well.
Add the mixture to the prepared tray or dish and press it firmly into the pan to create a flat and even layer (easier if wetting your hands with water beforehand and laying a piece of plastic wrap or baking tray on top of the mix). Store in the refrigerator or freezer for at least one hour.
Preheat the oven to 50°C (125°F).
Flip the baking tray onto a cutting board – the bars should come out of the tray easily. Cut into individual serving-sized portions and place onto a baking tray lined with baking paper. Dehydrate the bars in the preheated oven for 30 minutes.
Cool completely and store them in an airtight container in the refrigerator or freezer.
Tips and Variations
These high-fiber bars can be eaten raw. Place them in the freezer for about 15 minutes before portioning them, then keep them refrigerated or frozen.
The oats can be used raw or slightly toasted. Place the oats on a clean baking tray and put them into a preheated 175°C (340°F) oven for about 10 minutes or until they are lightly golden.
Use any dried fruit, such as dried cranberries or raisins, to replace the sour cherries.
Use 80 grams (1/4 cup) of agave syrup to replace the maple syrup.
Share Your Thoughts…
Have you ever tried making your own energy bars?
What was your favorite flavor combination?
Share as much or as little as you want…
Subscribe to VeganWeekly
Join the VeganWeekly community and get inspired each week to cook healthy and delicious vegan food that works for everyone – regardless of your current skill level.
Previously on VeganWeekly

Social Media
Catch up with me on social media…
Facebook ¦ Twitter ¦ Instagram ¦ LinkedIn ¦ Mastodon.green ¦ Post.news
I always love the variety of options you provide! Looking forward to adding tahini to mine - that sounds like a lovely sweet-savory combo.
Ooh, the possibilities! I'm all for a less-expensive alternative to the store-bought ones that have gotten SERIOUSLY out-of-control pricey. Thanks, Jack -- I'll let you know which one I make. Decision-making is often a challenge for me; I call it Blockbuster Syndrome. (I used to go to Blockbuster Video to find a movie for the evening, then walk out two hours later, empty-handed...:-)